Yosemite looks simple on a brochure and huge once you zoom in. That is why so many first-time visitors spend half the day driving, backtracking, and second-guessing the map.
The trick with a Yosemite National Park map is to ignore most of it on a first trip. A few zones give beginners the biggest views, the easiest logistics, and the least wasted time. Start there, then branch out on a return visit.
Before you pick hikes or viewpoints, lock in the right part of the park.
Key takeaways
- Yosemite Valley is the best starting point on almost every first visit.
- Glacier Point Road is the easiest add-on for huge views with light effort.
- Tioga Road and Tuolumne Meadows are excellent when they are open for the season.
- Wawona, Mariposa Grove, and Hetch Hetchy are usually better saved for a second trip.
Before you go
A few logistics make the map easier to read once you are actually planning a date:
- Entrance costs $35 per vehicle and is valid for seven consecutive days, per the National Park Service fee page. The park is cashless, so bring a card.
- No entrance reservation is required to visit Yosemite in 2026. The park announced in February 2026 that it will not run a timed-entry system this year, including during peak summer and the February firefall period. You still pay the entrance fee, and weekends fill up early, so arriving before peak hours helps.
- Glacier Point Road and Tioga Road are seasonal. Glacier Point Road typically opens late May and stays open into October, and Tioga Road usually opens by late May or June and closes in November. Snowpack shifts those dates every year, so check current road status before you commit a day to either one.
- The free Valley shuttle runs year-round, which makes Yosemite Valley easy to explore without moving your car.
How to read a Yosemite National Park map without overcomplicating it
The smartest way to use the map is by zone, not by trail name. Yosemite is massive, but most beginners only have time for one core area and maybe one scenic add-on.
So use a simple filter: easy access, high payoff, and low backtracking. That clears up the map fast. The official Yosemite maps are the best place to start, because they show the main roads, entrances, and seasonal closures in one place. If you know you will spend most of the day on the valley floor, the Yosemite Valley hiking map PDF is worth pulling up too.
Here is a quick triage for the main areas:
| Area | Best for | The short version |
|---|---|---|
| Yosemite Valley | First-timers, short hikes, famous views | Best all-around choice |
| Glacier Point Road | Overlooks, sunset, low-mileage outings | Best scenic add-on |
| Tioga Road | Meadows, domes, open space | Best if the road is open |
| Wawona or Hetch Hetchy | Repeat visits | Better on trip two |
Season matters too. Tioga Road and Glacier Point Road do not stay open year-round, so match the map to the month. If you are still picking dates, this guide to the best time to visit Yosemite will keep you from planning around a closed road.
Why Yosemite Valley deserves most of your attention
If only one part of the Yosemite National Park map gets circled, it should be Yosemite Valley. For beginners, it holds the best concentration of scenery in the entire park.
El Capitan, Half Dome, Bridalveil Fall, Yosemite Falls, meadows, river views, shuttle stops, and short walks are all packed into one zone. That means less driving and more actual time outside.
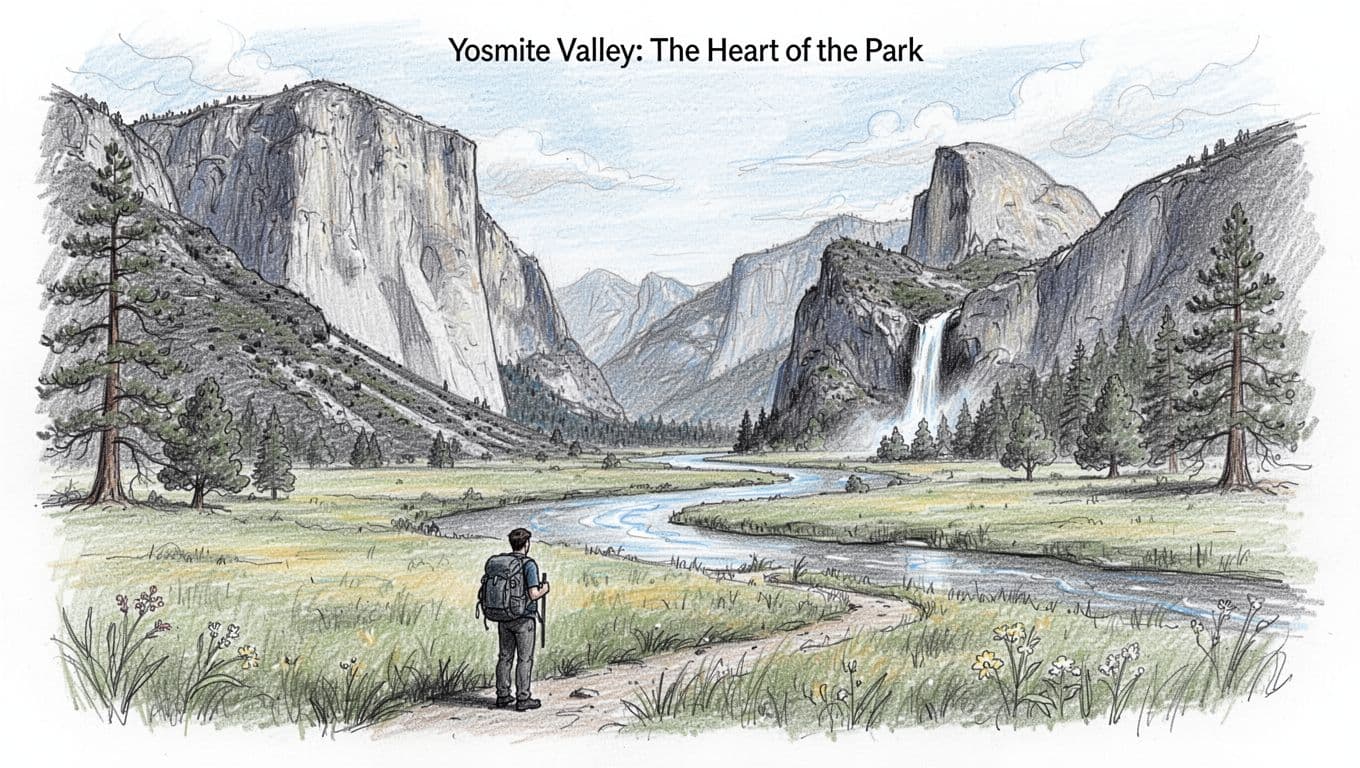
The best part is the flexibility. You can keep it easy with Lower Yosemite Fall, Cook’s Meadow, or Mirror Lake. Or, if you want a stronger workout, you can step up to the Mist Trail. For a tighter shortlist before you go, this roundup of the best hikes in Yosemite is a good starting point, and the Yosemite Valley day hikes guide pairs trails with a simple shuttle strategy so you are not circling for parking.
With a single day in Yosemite, give Yosemite Valley the morning and protect that time. It rewards an early start more than any other part of the park.
The catch is that the valley is also the busiest part of the map. By mid-morning, parking gets messy and the peaceful feel can fade fast. Starting early, parking once, and slowing down beats treating the valley like a drive-through highlight reel. For a fuller plan, this guide on how to avoid crowds in Yosemite covers start times and trail choices that actually work.
After the valley, pick one scenic road and commit to it
Once the valley is covered, there is no need to crisscross the whole park. Pick one road corridor and stick with it. That keeps the day cleaner and cuts down on pointless windshield time.
Glacier Point Road for the best return on effort
If Glacier Point Road is open, it is the easiest second focus area. The views are enormous, but the effort stays reasonable. Glacier Point, Sentinel Dome, and Taft Point all deliver that big Yosemite feeling without demanding an all-day grind.
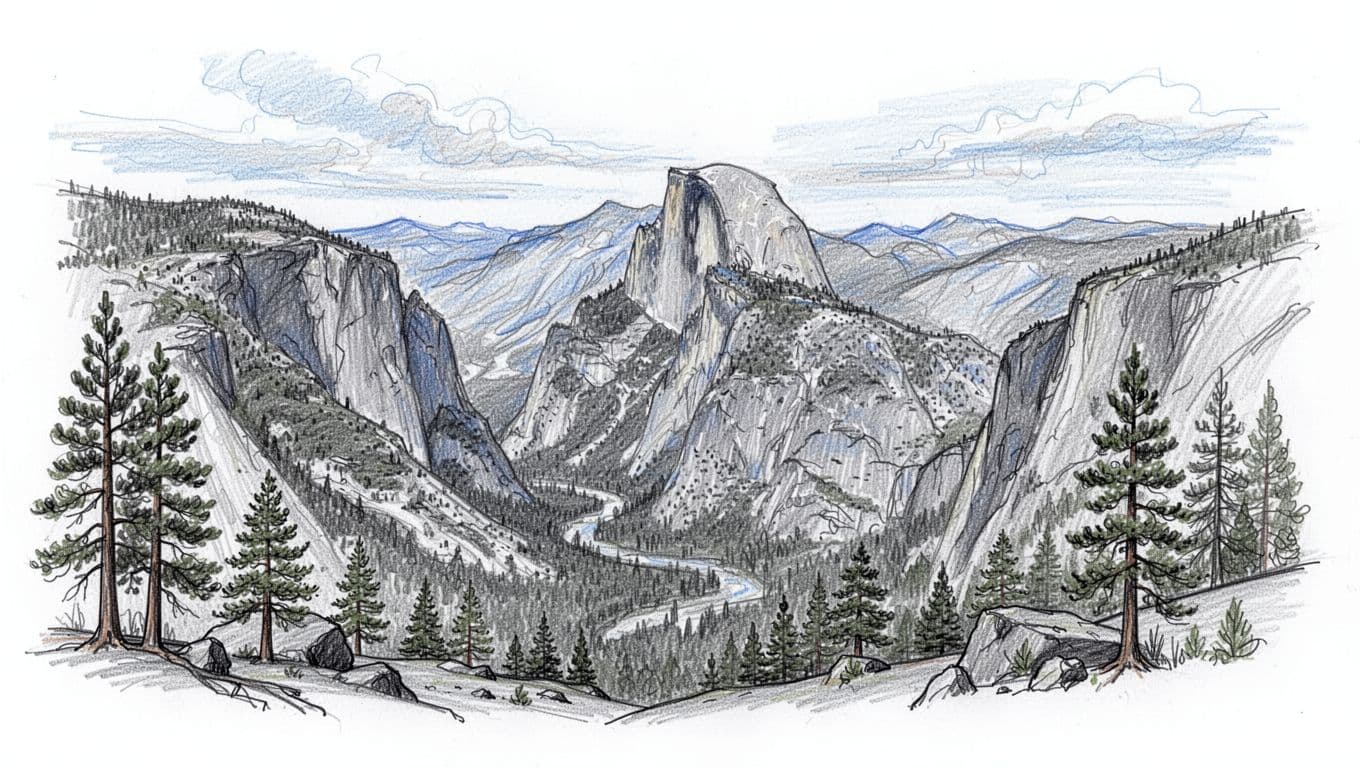
This zone feels like stepping onto the balcony after spending time on the main floor. You get the same granite drama, but the perspective changes everything. The only catch is seasonality. If the road is closed, do not build the day around wishful thinking.
Tioga Road and Tuolumne Meadows for space and calmer scenery
When Tioga Road is open, Tuolumne Meadows is a great shift in focus. The map suddenly feels wider and quieter. You trade some of the valley’s fame for open meadows, granite domes, alpine air, and more breathing room.
For beginners, that can be a sweet spot. The scenery comes fast, and many walks feel less intense than the steeper valley climbs. If you would rather see both the valley and the high country across a couple of days, the two-day Yosemite itinerary for first-timers maps it out without the rush.
The map areas worth saving for a second trip
Wawona, Mariposa Grove, and Hetch Hetchy are all worth seeing. None of them are throwaways. They just do not belong at the top of the map for most beginners unless there is a clear reason.
Mariposa Grove makes sense if giant sequoias are a must-see. Wawona is quieter and more relaxed. Hetch Hetchy is beautiful, but it asks for more driving and a little more intention. For a closer look at that quieter northwest corner, the Hetch Hetchy hiking guide covers the trail options and waterfall timing. On a short first visit, trying to squeeze all of them in usually waters down the whole trip.
A Yosemite map gets much easier once you stop trying to do the whole park in one sweep. Focus first on Yosemite Valley, then add Glacier Point Road or Tioga Road if the season allows. Circle one main zone, pick one backup, and call it a solid plan. If you want help matching trails to your time and energy, this free personalized Yosemite day hike planner is a fast way to narrow it down.
FAQs about Yosemite National Park map planning
What part of Yosemite should I focus on first?
Yosemite Valley first. It has the biggest concentration of classic views, easy walks, and beginner-friendly logistics.
Is Yosemite Valley enough for one day?
Yes. For many first-timers, it is the smartest one-day focus because you can see a lot without long drives.
Do I need a reservation to enter Yosemite in 2026?
No. Yosemite is not using a timed-entry reservation system in 2026. You still pay the $35 per vehicle entrance fee, and weekends and holidays get busy, so an early arrival helps.
What is the best map area for beginner hikes?
Yosemite Valley. You will find short scenic walks, clear landmarks, and easier route choices than in the higher-country zones.
Should I bring a paper map if I already use my phone?
Yes. Cell service can be spotty, and a downloaded or printed map makes life easier when road signs come up fast.